Creating Events
Estimated Reading Time: 3 MinutesThere are two ways to add events to QuikBox Calendar
Quick Mode
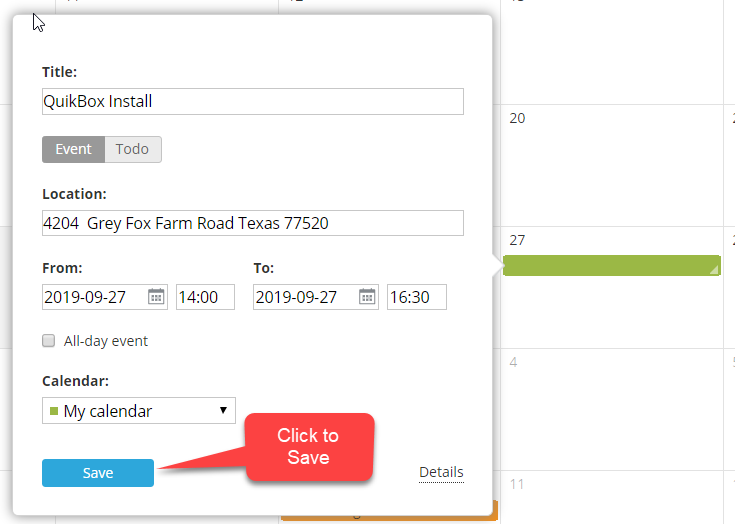
- Left-click within a day you wish to add an event to
- In a new popup window, enter the event basic information: title, location, time and select the calendar you wish to add your event to (the description of these options is provided in the Advanced Mode instruction
- click the Save button to add the event to the calendar or use the Details link to switch to the advanced mode.
Advanced Mode
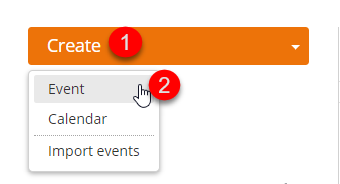
- Click the Create button in the upper left corner and select the Event option,
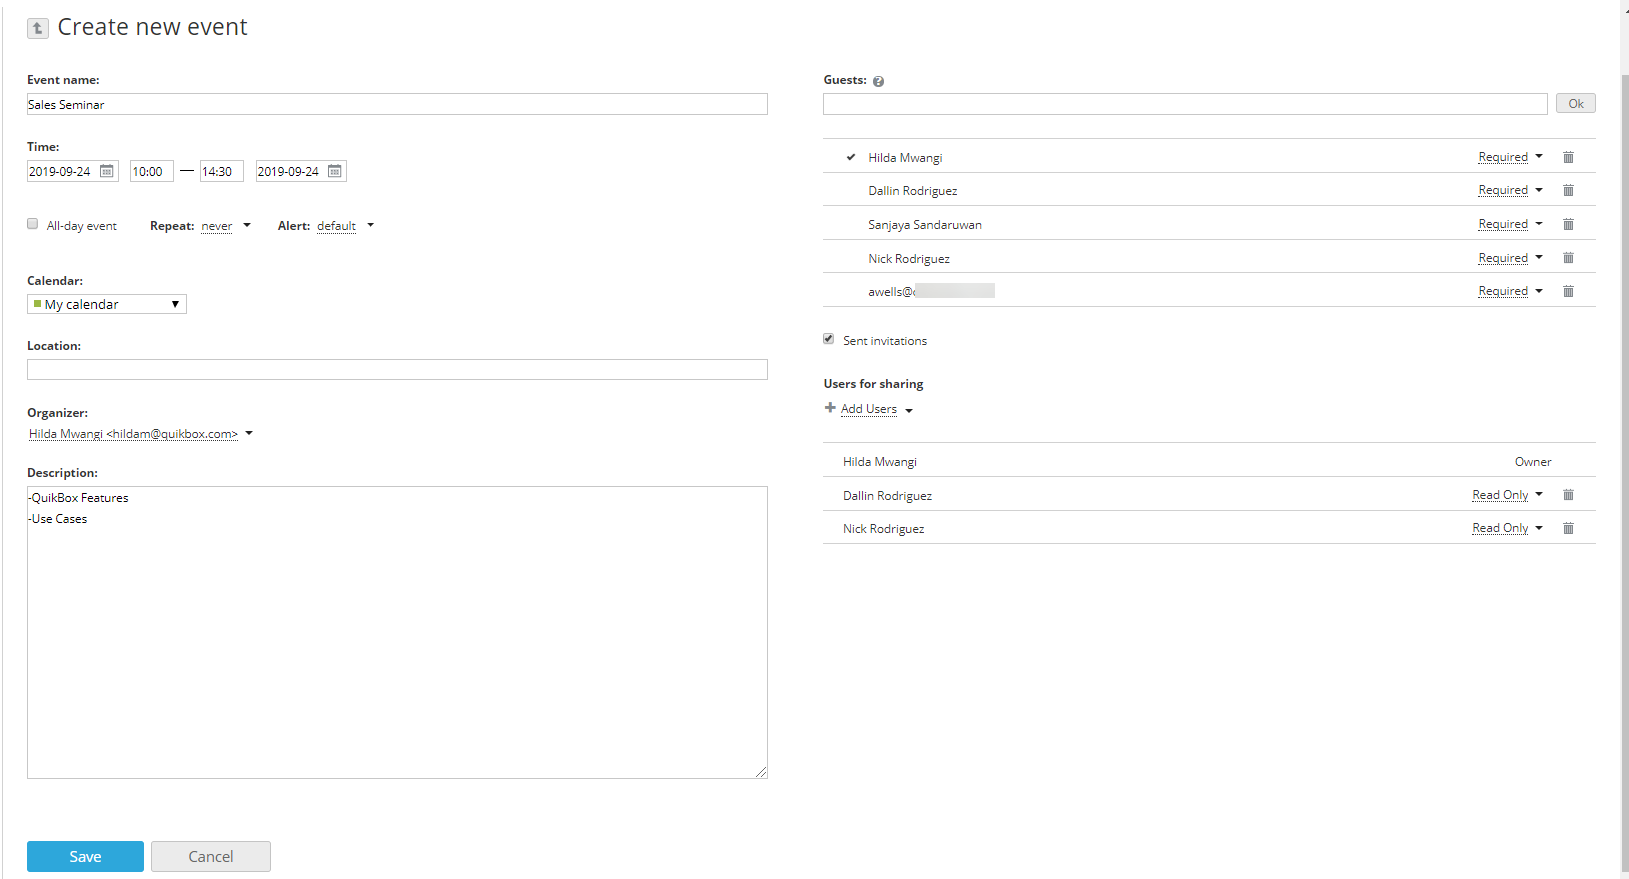
- Enter the event title,
- Set the event time:
- To create an event that lasts for an entire day or longer, leave the All-day event box checked and set the start and end dates.
Enter the date you need in the From: and To: fields using the keyboard or clicking the corresponding
 icon and selecting the necessary date.
 -
to create an event that occurs at specific time, uncheck the All-day event box and enter a desired start and end time values.
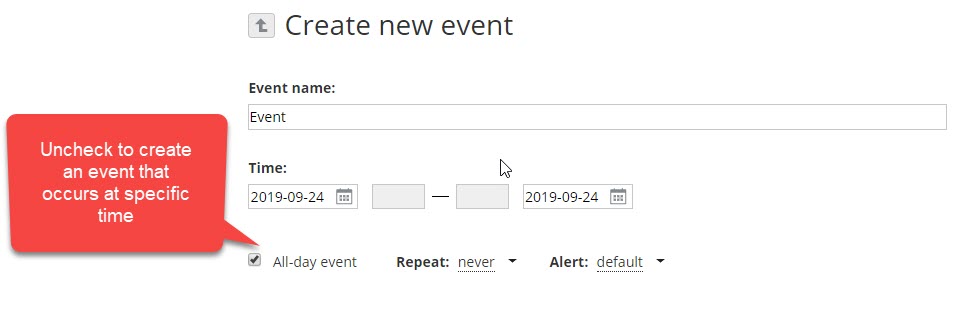
- To create an event that lasts for an entire day or longer, leave the All-day event box checked and set the start and end dates.
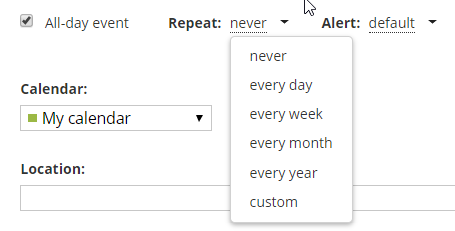
- Set a recurrence period, if you wish to repeat your event on a regular basis,
Open the Repeat drop-down list and select one of the available options: every day, every week, every month, every year. To set a custom recurrence period select the corresponding option from the Repeat drop-down list and adjust the available settings.
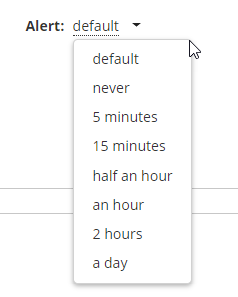
- set your event reminder,
By default, you will be informed about your event added to the My calendar 15 minutes before it occurs. If you want to change the reminder time, open the Alert drop-down list and select one of the available options: 5 minutes, 15 minutes, half an hour, an hour, 2 hours, a day. To switch the reminder off select the never option from the drop-down list.
 Keep in mind that the notification will be sent according to the time zone set for the calendar you add the event to.
 - If you have several calendars, select the Calendar you wish to add your event to from the drop-down list
- Specify the event Location
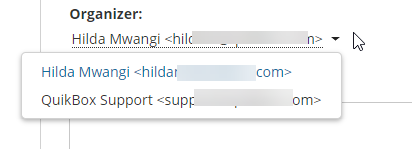
- If you have several email accounts connected in the Mail module, you can change the Organizer email address, selecting the necessary one from the list.
You will receive notifications about the guest attendance to the selected email address.
- Add a Description for your event,
- Invite Guests to your event,
Start typing the guest name or email address and choose the necessary contact from the list (your personal, CRM and portal contacts that match the entered characters are displayed there as you type). If you enter a new email address that is not stored in your Mail contacts, press Enter or click the Ok button on the right to add the guest.
Then you can specify the necessity for the presence of each guest. The Required option is selected by default, but you can change it to the Optional one.
To remove a guest, use the
 icon.Guests can only view the event. If you want to let another portal user edit the event and invite other guests, use the Add users link at the bottom of the page, and provide the user Full access to the event.
 - Click the Save button.
If you have added some guests, the Send invitations window will appear. Decide if you want to send invitations to guests or not and click the corresponding button.
The added event will be highlighted with the color of the selected calendar.
The invited guests will receive email notifications, they will be able to accept/decline the invitation choosing the Yes, Maybe or No option right from the email message as well as from the event preview window in the Calendar. The decision can be changed later.
To open the event preview window, left-click the event in the calendar. In this window, you can also view the total number of invited guests and the quantity of guests who have accepted/declined the invitation.