Can’t Access Scanner Profile
- Ensure you are using the right driver
- Uninstall and update your drivers
- Try changing the Mode and/or Transfer type
- Try scanning with the Use Scanner Dialog option turned on.
Step 1: Update your Driver
FileCenter doesn't do the actual Scanning. Your Scanner driver does. FileCenter only puts in "requests" to the driver through Windows and receives pages in return.
- Go to the Windows Control Panel > Programs and Features
- Uninstall everything related to your scanner
Now install an updated driver:
- Note the scanner manufacturer
- Note the scanner model number (find it on the bottom or back of the scanner)
- Go to the scanner maker's website
- Look for a link that says Downloads, Drivers, or Support
- There should be an option to look up a driver for your scanner
- Download the TWAIN driver setup file for your version of Windows
- Run the setup file
- Follow the instructions in the setup
- Turn on your scanner; Windows should find and recognize it
Step 2: Select the right driver on FileCenter
- Click on the Scan Drop down and "Select Scanner"
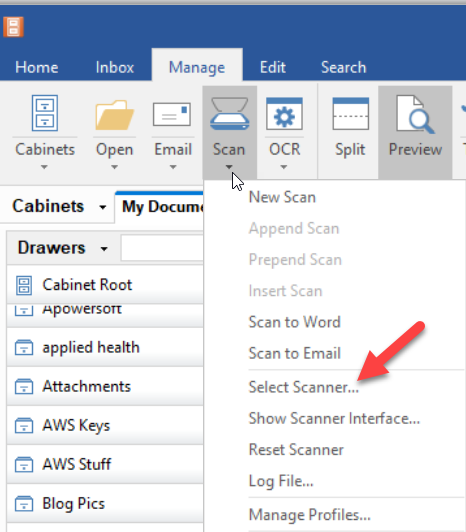
- You will see a list of every TWAIN scanner Windows recognizes on your computer. If your scanner is there more than once, first try the one that doesn't have WIA in the name, then try the WIA option.
- If your scanner isn't on the list, Windows can't see it. Either it could be that it doesn't have a TWAIN driver, or it isn't turned on or plugged in properly.
- If you're sure it's plugged in and turned on, first try a different USB port (common problem), then try a different USB cable. If it's a wireless scanner, you may need to plug it in with a USB cable instead.
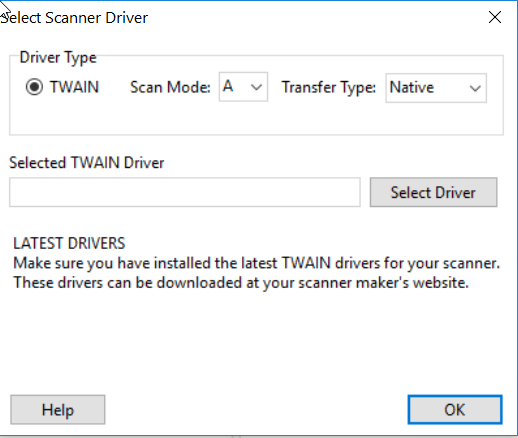
Step 3. Change The Scanning Mode And Transfer Type
On FileCenter's Scan dialog, click Select next to the Scanner field. You'll now see two options: Mode and Transfer. Do the following:
- Set the Mode to "A"
- Set the Transfer type to "Native"
- Try a scan
- If the scan fails, change the Mode to "B"
- Try a scan
- If the scan fails, continue trying each one of the Mode options
IMPORTANT: If you ever get an error, a crash, or a message that the scanner is busy or in use, you'll need to reboot your computer and scanner before proceeding.
If the scan still fails, change the Transfer type to "Memory" and start over, trying each of the modes. Then change the transfer type to "File" and try each of the modes again, continuing in this manner until you find a combination that works.
Step 4. Show The Scanner Dialog
Some scanners have problems if you don't scan through their interface. This can include everything from crashes to blank or skipped pages to problems with resolution and paper size.
On FileCenter's Scan dialog, select the option called Use Scanner Dialog then click Start Scan. Your scanner's interface will pop up. Proceed with the scan. If it works, you will want to make this setting permanent:
- Open the Scan dialog
- Select Use Scanner Dialog
- Click the little Save link next to Profile
Article ID: 40
Created: September 11, 2019
Last Updated: September 11, 2019
Author: QuikBox Admin [[email protected]]
Online URL: https://support.quikbox.com/article.php?id=40